Got this new little gadget at a bead show a few weeks ago, have you seen any awesome jewelry made with this technique?
Tuesday, December 1, 2009
Monday, October 26, 2009
Handmade jewelry box template
While searching for a good jewelry box template, I found this site! You can download free box template there! Now you can get ready for Christmas!! :)
Monday, October 19, 2009
Crochet Necklace
For those of you who are interested in learning how to make a crochet necklace! This is a great video by Karla Kam!
Friday, October 16, 2009
Monday, October 5, 2009
Saturday, October 3, 2009
New bracelet by Jackie
This is a gorgeous bracelet that was made by Jackie, one of my students at the studio! Take a look! I love the color she had chosen! Beautiful, isn't it?


Monday, September 28, 2009
Lampwork Pendant Necklace

For those of you that had visited my studio in recent weeks since its opening, thank you! I am now trying to raise fund to purchase individual magnifying glass lamps for my students.
Above is the necklace that I had designed over the weekend for this cause.(Please click on the image to see the enlarged picture) This will also be a beautiful unique gift for friends and families. You are welcome to purchase directly here. All purchase will be shipped by October 8! Thank you for your support!!
Monday, September 21, 2009
Interesting bottle cap earrings!
Take a look, it's quite interesting! :) What a creative idea to recycle! Although this is not something that I would wear....
Tuesday, September 1, 2009
CreativFestival-Toronto
Those of you who are located in Toronto, have u ever gone to the Creative Festival in the Metro Convention Center? Any of you interested in going? Here is a brochure for the show! You can get three dollars discount when you order the ticket online in advance.
This show will include sewing, knitting, BEADING, stitching, quilting, scrapbooking and more.....

This show will include sewing, knitting, BEADING, stitching, quilting, scrapbooking and more.....
Sunday, August 30, 2009
Pearl Documentary
Most of us love the luster of pearls, here is a documentary by pearlparadise.com, take a look! There are two parts to this video. Although I too love pearls, it seem just a little bit cruel to see the insertion to the oyster.
Friday, August 21, 2009
Flower and beaded chain necklace

Just want to share this necklace with you all. What do you think about the addition of the silk flower? :)
Wednesday, August 19, 2009
How to use Bead Spinner
Ever wonder how to use bead spinner? Isn't that amazing? :) Have you used it before?
Thursday, August 13, 2009
Briolette chandelier Earrings by Beadworks
A beautiful beaded earrings by Beadworks. This is a simple way to use your briolettes!! Take a look Here!! :)
Wednesday, August 12, 2009
Fruity Bracelet
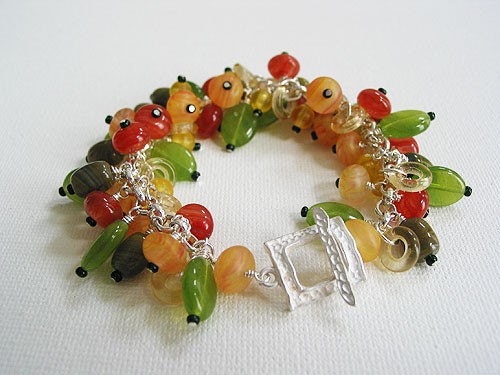 Sorry, haven't post for quite sometime! Above is a new bracelet that I recently taught at my beading class! I used merely wire wrapping technique for this project. You can view my clear step-by-step wire wrapping technique with headpins HERE!
If you are interested in purchasing the supplies for this bracelet, it's US$15 (Plus $5.00 for shipping). Please leave me a comment for this post if you are interested!
Monday, June 29, 2009
Monday, June 22, 2009
Wednesday, June 17, 2009
Hardwear: Jewelry from a Toolbox
I found this book called Hardwear: jewelry from a toolbox in the library the other day, it's quite interesting. If you like funky jewelry, be sure to check it out! There are 24 striking, easy-to-make pieces of jewelry fashioned from nuts and metal washers, S hooks and O rings, rubber sheeting and rubber.... Check Amazon or Chapters for details. There is also a copy in the Toronto library, if you wish to borrow it for free. ISBN 1-58479-480-1
Monday, June 15, 2009
Tuesday, June 9, 2009
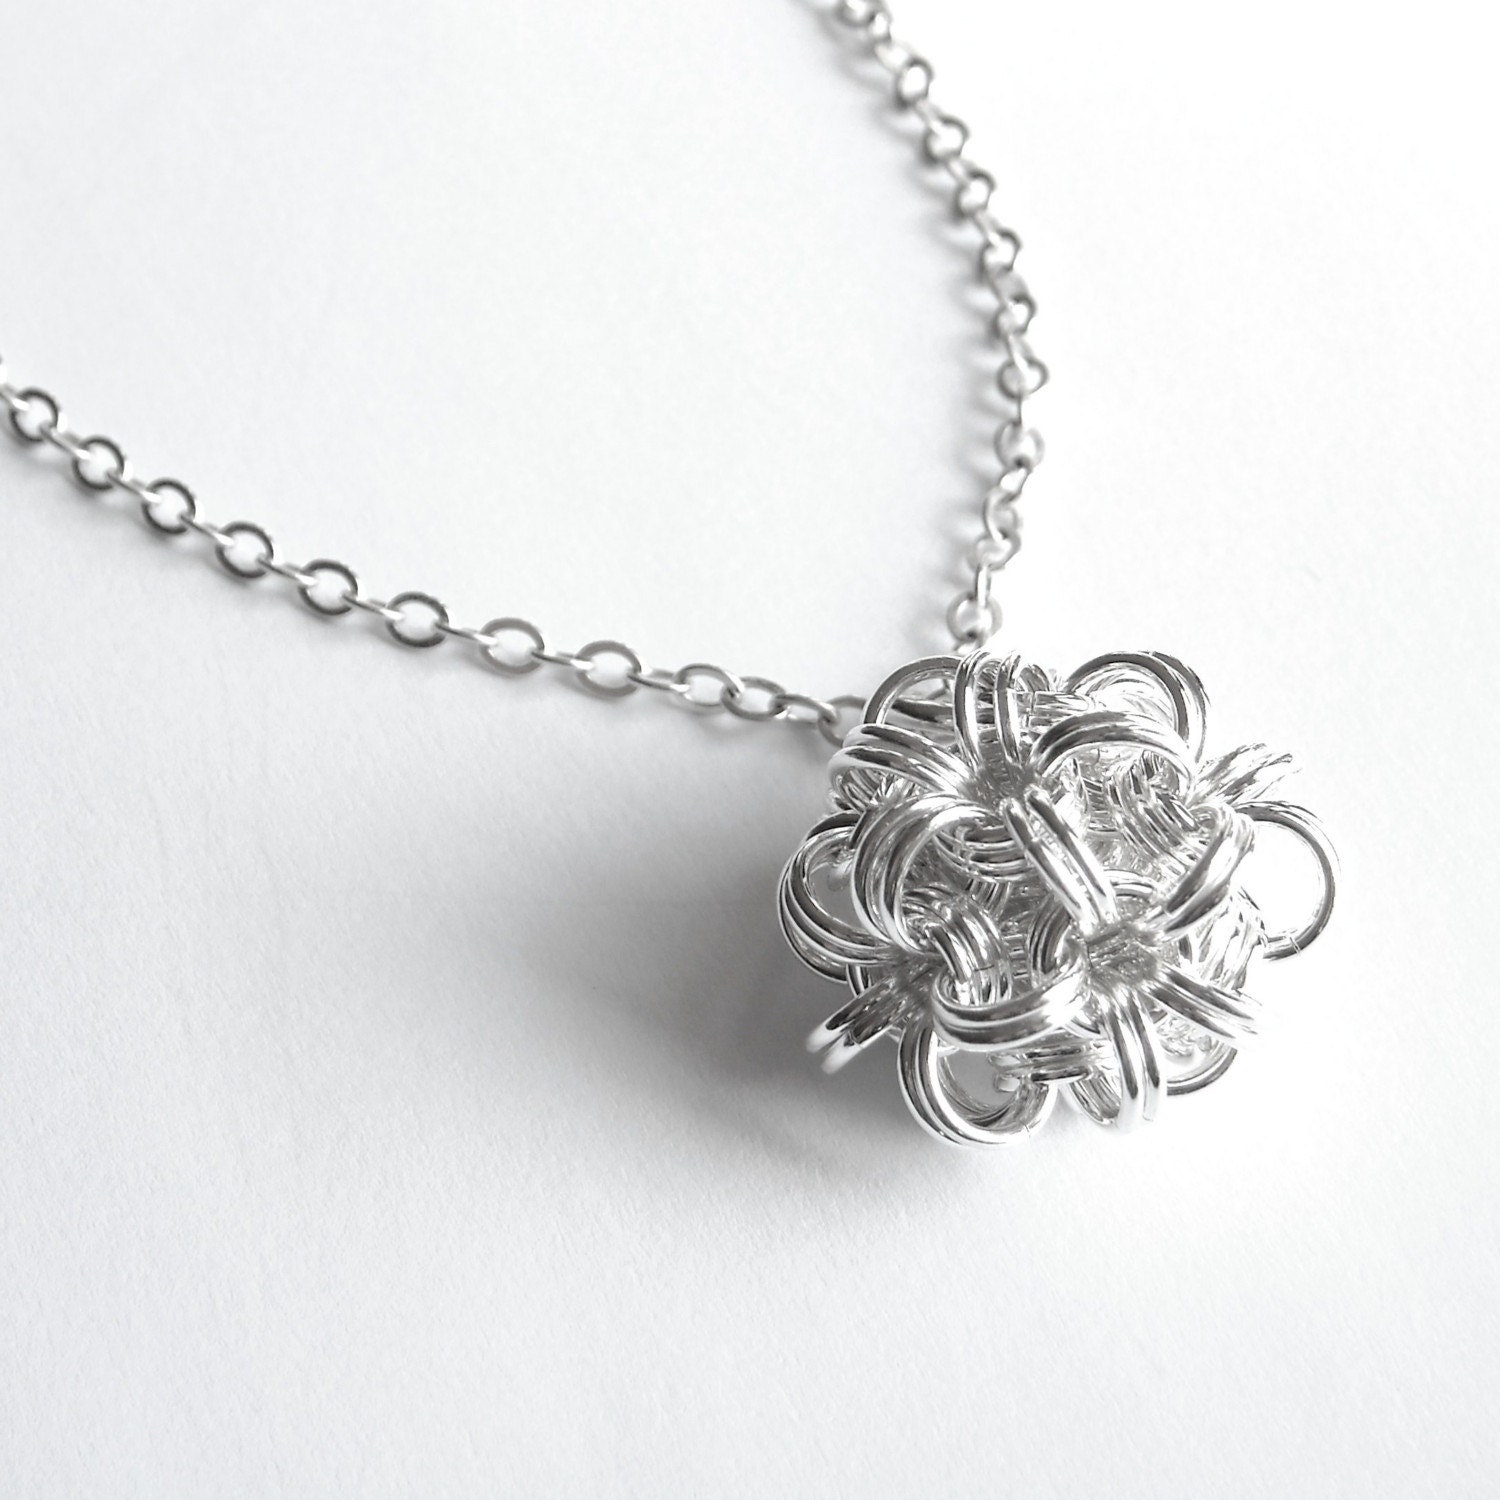
Chainmail pendant
Wow, never thought chainmail can be made into a pendant, too!! How creative, take a look HERE!!
Sunday, June 7, 2009
Byzantine chainmail technique video
Want to learn how to make Byzantine chainmail? I did some research and found this video which I think is the best. Take a look! I'm gonna to give it a try sometime!! :)
Saturday, June 6, 2009
Beautiful byzantine chainmail necklace
Has any of you tried chainmail? I came across this gorgeous chainmail necklace. Take a look at it HERE!!
Monday, June 1, 2009
Thursday, May 28, 2009
Tuesday, May 26, 2009
How to make hemp jewelry
Just want to share this site that I came across yesterday with you all. There is clear diagram on the website! Check it out!!
Monday, May 25, 2009
Saturday, May 23, 2009
Tropical Palms Earrings by Erin Weik
Here is a beautiful summer earring project by Erin Weik that you might want to try. Take a look HERE! There is complete material list, pictures, and instructions.
Friday, May 22, 2009
Interesting marketing ideas
How do you market your business, be it jewelry or other crafts. I recently came across this interesting idea online, and I quote:
"We all get junk mail with the postage paid envelopes. Just send a flyer or your business card back to the company and use their return envelope. ;) " (from beadstashdestash.blogspot.com)
Do you have any other interesting marketing ideas? Lets share some of our awesome ideas here!!
"We all get junk mail with the postage paid envelopes. Just send a flyer or your business card back to the company and use their return envelope. ;) " (from beadstashdestash.blogspot.com)
Do you have any other interesting marketing ideas? Lets share some of our awesome ideas here!!
Thursday, May 21, 2009
Beadwork Pattern Play Challenge
Just saw the Beadwork Pattern Play Challenge on beadingdaily, take a look and see if you are interested in taking the challenge to publish your design in an upcoming issue of Beadwork magazine! :)
Wednesday, May 20, 2009
Tuesday, May 19, 2009
Classic Pearl Choker Necklace by Jewelry Making Professor
Here is a gorgeous pearl necklace by Jewelry Making Professor, take a peek here! You will love what you see! :)
Monday, May 18, 2009
Necklace Tutorial by Rings and Things
Another beautiful necklace tutorial by Rings & Things. It's in PDF format, so you can easily print this 2-page tutorial right from your printer! You may browse Rings and Things for their supplies and materials on their website!
Thursday, May 14, 2009
Wednesday, May 13, 2009
Bracelet Tutorial by Rings & Things
Check out this beautiful filigree bracelet tutorial by Rings & Things. It's in PDF format, so you can easily print this 2-page tutorial right from your printer!
Tuesday, May 12, 2009
Wire wrapped earrings
I came across this wire wrapped earrings on Johnsbrana, looks quite interesting with the bronze pearl interweaving on the wires.
Benefits of Beading
I found this great article on benefits of beading! Indeed, this is such an awesome hobby! I think the best part I like about this hobby is its practicability. It is such a rewarding hobby. What do you like so much about beading?
Monday, May 11, 2009
Friday, May 8, 2009
Wire Sculpted Pharaoh Pendant
Watch this 30 minutes long video tutorial on how you can make a wire sculpted Pharaoh pendant. It's very clear and easy to follow!
Thursday, May 7, 2009
Combine wire wrapping with stringing
I saw this interesting pearl necklace on toppearl.com, just thought I should share it with you! They use wire wrapping technique to connect a number of focal pearls with crystals, then finish off the rest of the necklace by regular stringing technique. An interesting technique combination. I can already think of many design ideas with this inspirations!
Tuesday, May 5, 2009
Monday, May 4, 2009
My bracelet design for Mother's Day
This is a bracelet that I designed for mother's day! There are Swarovski crystals in the center of the two motifs which are surrounded by pink glass roundels. Then the two motifs are connected by glass pearls and light pink seedbeads. You can view how to make the motif pattern by watching this video clip. I only made one layer of the pendant as seen in the video tutorial. And, instead of having 5 seedbeads in the center as seen in the video, I have 6.


If you prefer to purchase this bracelet made, you may do so by clicking the Paypal "Buy Now" button below. I will also include a beautiful gift box for this bracelet.
The total price for this bracelet is USD$25.00 (FREE shipping to U.S. and Canada)!! You may also select from three bracelet sizes to get your desired length.


The total price for this bracelet is USD$25.00 (FREE shipping to U.S. and Canada)!! You may also select from three bracelet sizes to get your desired length.
My Mother's Day Gift
Are you making something special for your mom for mother's day? I came up with this pink bracelet design which I will post shortly. Just working on the photos right now, I will be posting it later today! :) Hope you will like it!!
Sunday, May 3, 2009
Saturday, May 2, 2009
Friday, May 1, 2009
Jewelry from Murano, Italy
About two years ago, I had the opportunity to go to Italy. I not only visited Venice for the first time, but also went to the world famous glass making Murano island. I want to share with you some of the pictures that I took there, especially some of the beautiful jewelry they produce on the island. If you are interested in reading about some historical background about Murano and its glass making history, please check out the links below:
http://www.fossilfly.com/history_of_Murano_glass.htm
http://www.studiosoft.it/muranohistory.htm
http://www.venetianglasstrinkets.co.uk/info.php
Below are the pictures that I took, enjoy!!


http://www.fossilfly.com/history_of_Murano_glass.htm
http://www.studiosoft.it/muranohistory.htm
http://www.venetianglasstrinkets.co.uk/info.php
Below are the pictures that I took, enjoy!!


Trip cancelled yesterday, Sorry.......
Hi all, it rained almost all day yesterday in Toronto, and I had to cancel my trip!! :( Although I had planned to browse and do some shopping in downtown, I knew my pictures will not turn out as nice, so I will try it again within a few weeks!! And, I promise I will post some pictures here!
Thursday, April 30, 2009
Shopping and Browsing
Hello, by the time that you see this post, I will be on my way to downtown Toronto for some shopping and browsing. I will share what I find with you after I get back! :) Unfortunately it seems it's going to rain tomorrow.... :( Hope my pictures will still come out alright.
Wednesday, April 29, 2009
Tuesday, April 28, 2009
Monday, April 27, 2009
Swarovski crystal ribbon bracelet
Have you tried right angle weave technique yet? You can create this gorgeous crystal ribbon with Swarovski crystals. This tutorial is by BeadandButton magazine, if you are interested, you can download their free PDF tutorial for this bracelet HERE!
Sunday, April 26, 2009
Beaded earring with Swarovski crystals
 This is another pair of earrings that I made using the double sided beaded pendant technique. I love this shade of green. You can come up with a lot of different design ideas with this technique by using different shape of beads. Have you done any jewelry with this technique, would you like to share it with us? If you have, please leave me a comment with the link to your image! Lets see some of your work here, too! :)
Saturday, April 25, 2009
Friday, April 24, 2009
Eye Candies - Swarovski Crystal Jewelry
This is what I discovered today! Lots of eye candies! Simply click on the images to view the next image! There are thirty-three pictures in total! :) Which one is your favorite? I like no. 26, the pearl bracelet, it's so pretty and feminine!!
Thursday, April 23, 2009
Briolette Wire Wrapping Technique
A very nice and clear video tutorial on wire wrapping a briolette. Take a look, and see if you could follow this tutorial. Once you have learned this technique, you could start implementing this technique and adding any type of beads that have horizontal holes to your jewelry design.
Wednesday, April 22, 2009
Bracelet 003
Level of difficulty: ♥♥
 This is a great project for chainmail beginners. Below are the tools and supplies that you will need for this bracelet.
Tools:
2x Chain-nose plier
Materials:
1 x Lobster Claw Clasp
72 x 8mm silver jump rings
2 x 6mm silver jump rings
18 x 6mm round fresh-water pearls
Directions:
I used 6mm fresh water pearls, and 8mm jump rings to create this chainmail bracelet. You can also try this project with larger round beads of any kind, with jump rings being 2mm larger than the size of the beads. I want a simple and elegant look, so I only used the pale green fresh water pearls that I have on hand. I think the even sized Swarovski crystal pearls or the round crystals will look very nice, too!
You can download the tutorial for this chainmail bracelet HERE.
Tuesday, April 21, 2009
Do you have a gmail account?
If you have a gmail account, you can subscribe to read the new tutorials and posts on JewelryDIY in the comfort of your gmail account. Please follow the steps below for easy subscription:
1. log in to your gmail account.
2. Click here to go to this link.
3. Choose "Add to Google Reader".
And, you are done! In the future, all my posts and tutorials, including all the pictures and links will be sent to your google reader. This means, when you log on to your gmail, you will be able to see "Reader" on the top of your log in page. Simply click on "reader", and you will be able to see all of JewelryDIY's posts!
Jewelry Fashion, Fall 2009 Ready-to-Wear, Paris
Found the Fall 2009 Ready-to-wear jewelry pictures on Facebook today, just want to share it with you all. Some of the jewelries are so out of ordinary, so be prepared!! :) I guess we all need to step out of our comfort zone sometimes, and look at jewelry as an art form. Hope we all get inspired one way or another!
Click HERE to view the pictures!! You can simply click on the picture to view the next picture. There are 48 pictures in total.
Click HERE to view the pictures!! You can simply click on the picture to view the next picture. There are 48 pictures in total.
Monday, April 20, 2009
Seedbeads Bargains

Do you use seedbeads? I have accumulated so much seedbeads over the years for my own projects and beading classes, it's unbelievable!! I would like to get rid of some of them to free up more storage space at home. I have listed about 20 different colors of size 10 and 11 seedbeads on sale at my store, if you are interested, please feel free to take a look. They are only priced for US$1.50/10g packet, some of the colours I have a lot, but some I only have 2 or 3 packets left. So, take a look now while many choices are still available! Thanks!
Beaded Earring with crystal and glass beads
 This is a pair of earrings that I made sometime ago using the double sided pendant technique that was posted yesterday. Unlike the tutorial, I have six beads in the center instead of five. Upon finishing the pendant, add four more seedbeads between the six outer swarovski crystals. You might also want to add the earring wires and any beads for extra dangles at this time.
Can you come up with anymore jewelry ideas with the double sided pendant?
Sunday, April 19, 2009
Double Sided Beaded Pendant Video Tutorial
This is a more than 13 minutes long tutorial that is divided into two parts. I think you will find this video easy to follow by doing it with the video. Remember that you can pause it whenever you want! I will be posting some ideas of what you can do with this technique in a few weeks! :) Enjoy!!
Saturday, April 18, 2009
Swirl Accent Wire Wrapped Bead Necklace
 I made this wire wrapped necklace today! Just want to post it and share with you all. I tried a little fancier wire wraps this time. The swirls on the bead gives the necklace an interesting artistic touch! Hope you like it! :) When I get a chance, I will try
 Save as Draft
Friday, April 17, 2009
Thursday, April 16, 2009
Simple Handmade Earring Gift Box
 While looking for a new and cute way to package some of my simple earrings as gifts for my niece's birthday party, I came up with this idea of using cute little favor boxes to package earrings. It turned out to be an awesome idea for young girls. My niece packaged about 8 different pairs of earrings into these boxes (all the boxes look very similar from the outside), and gave to her friends when they came over for her birthday party. It was quite a surprise for all the girls, and they all end up loving the pair they picked!
Have you ever consider holding a simple jewelry-making party for your girl? Try it, I think it would be a lot of fun!!
Wednesday, April 15, 2009
Tuesday, April 14, 2009
Jewelry DIY Feed Subscription


Many of you have asked me how you could more conveniently view my complete listing of jewelry tutorials, tips and ideas, and I have suggested that you subscribe to this blog's feed. Below is how you can do this.
1. Click this link here, and you will see either one of the screen as shown on the right.
2. Press either the "View Feed XML" or "Subscribe Now" button. (if you scroll down on the page there, you will already be able to see all the posts and tutorials).
3. You will then see a pop up window that says "Add Live Bookmark", and just click "Add".
4. A yellow button with "Jewelry DIY" will now appear on your browser. Simply by clicking this button in the future, and you will be led to the page of my complete listing of recent posts.
Hope this helps, and THANK YOU for subscribing! :)
Bracelet 002
Level of difficulty: ♥
 This is a simple bracelet I made using bead tips. Below are the tools and supplies that you will need for this bracelet.
Tools:
scissors
chain-nose pliers
Materials:
1 clasp
stringing wire
small silver round beads
12x large glass bead nuggets
6x bead caps
3x 10mm glass pearls
2x crimp beads
2x bead tips
Directions:
1. Arrange all the beads to your desired pattern.
2. You can use bead-tips to attach the stringing wire to the clasp before you start stringing the beads.
3. Add small silver round beads between all the larger beads to give the bracelet a nice accent of silver.
Monday, April 13, 2009
FREE Wire Wrapping with Headpins Tutorial in PDF ready
 I have just converted my wire wrapping with headpins tutorial into PDF format. With this file, you will be able to print out a 7 pages tutorial in clear step-by-step photos and instructions. If you would like to get a free copy of this file, please read my previous post for instructions. For those of you who had already requested the file, you should be expecting to receive the file by the end of Tomorrow.
Saturday, April 11, 2009
Using Bead Tips
Have you ever wondered how to use bead tips? This is quite a handy component to incorporate into your creations!
Wednesday, April 8, 2009
Wire Wrapping Tutorial in PDF
During this coming weekend, I will be compiling my previous step-by-step wire wrapping tutorial into PDF format. If you would like to print out a hard copy of this step-by-step tutorial for quick future reference, please feel free to leave me your name and your email address in the comment below this post. Please make sure your email address is correct before you submit it, so the file will be able to reach you. All the comments here will be invisible to the public.
Tuesday, April 7, 2009
Right Angle Weave
If you want to learn how to do right angle weave, this is a great video to watch. Karla also teaches you how to make a crystal beaded bead using this technique.
Necklace 001
Level of difficulty: ♥♥♥
 This is a necklace I made using wire wrapping with headpins technique. Below are the tools and supplies that you will need for this necklace.
If you are interested in making an identical necklace as shown in the picture, you may purchase the kit at my store.
Tools:
Chain-nose plier
Round-nose plier
Side Cutter
Materials:
7 x beads of one kind
6 x beads of one kind
16" metal chain
1 x clasp
2 x jump rings
13 x 1.5" ~2" headpins
Directions:
1. Before you start, line your chain flat on the table, and place the beads in the order and position that you desire them to hang on the chain. If you prefer an even look, you might want to count how many links are between each bead to make sure they are evenly spaced out.
2. Using wire wrapping with headpins technique, add all the beads to your desired position on the chain. Remember that you need to attach your unfinished wire wrap at step 8, before you close your wrap.
3. After you have finished attaching all the beads, wrap it around your neck to see if it is your desired length. If not, cut off the excess chain from both side of your chain, so that you have equal length of empty chain on both side.
4. Attach the clasp to the chain by using jump rings.
Monday, April 6, 2009
Wire Wrapping with
Headpins
Level of difficulty: ♥♥♥
Total steps: 13
This is a very useful technique to learn. If you are new to wire-wrapping, you might find it a little challenging at first. However, do not feel discouraged after a few tries. Keep practicing, eventually you will be able to remember all the steps, and your skill will improve. This is a skill that you will find very indispensable. Feel free to leave me a comment if you have any question!
You will need these tools:
Chain-nose pliers
Round-nose pliers
Side Cutter
You will need these tools:
Chain-nose pliers
Round-nose pliers
Side Cutter
Wire wrapping with headpins: Step 1
You need a headpin, approximately 2 inches long, and a bead (I used a 10mm glass pearl)


Wire wrapping with headpins: Step 3
Use your chain-nose pliers, grab your headpin, leaving about 2-3 mm gap above your bead.

Wire wrapping with headpins: Step 4
Now, holding the pliers in your hand, make a 90 degrees bent, so your headpin will now look like this. Make sure the gap is still present above the bead.

Wire wrapping with headpins: Step 5
Take your round-nose pliers, position your pliers by grabbing your pin as shown in the picture on the right.

Wire wrapping with headpins: Step 6
While holding your pliers with one hand, use your other hand to bent the pin upwards and around the curve of the tip of the round-nose pliers. Your pin should now look like the picture on the right.

Wire wrapping with headpins: Step 7
Now, reposition your round nose pliers by moving the lower tip of your pliers upward, so your pliers are now grabbing the wire loop which you just formed in the previous step.

Wire wrapping with headpins: Step 8
Keep grabbing tight to your pliers with your dominant hand, and use the other hand to bent your pin 180 degrees to the other side. This is the loop for your wire-wrap.

It is important to pause here if you would like to attach any chain or components that has a closed or soldered loop. Simply take your half-finished wire wrap, and slide your desired chain or other jewelry component's ring through the pin, so that the link of your chain or a jewelry component's loop falls inside your half-finished wire-wrap loop.
It is important to pause here if you would like to attach any chain or components that has a closed or soldered loop. Simply take your half-finished wire wrap, and slide your desired chain or other jewelry component's ring through the pin, so that the link of your chain or a jewelry component's loop falls inside your half-finished wire-wrap loop.
Wire wrapping with headpins: Step 9
Now, take your chain-nose pliers again, grab the loop that you had made previously as shown in the picture. My loop is now lying flat between my pliers.

Wire wrapping with headpins: Step 10
While holding the loop with your pliers, use your other hand to wrap the remaining portion of your pin closely around the gap above the bead. Usually you will need between 2 to 3 wraps. I almost always make 3 wraps. Think about this step as wrapping the scarf around the neck.


Friday, April 3, 2009
How to Knot Pearls
If you want to learn how to do pearl knotting, this is a great video to watch. Pearl knotting is an awesome technique to master if you would like to string pearls and gemstones with higher market or sentimental values.
Wednesday, April 1, 2009
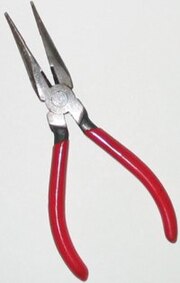
Side Cutter

This is the shape of the tip of my side cutter. If possible, invest a little more on this irreplaceable tool. Depending on the thickness and hardness of the pins and wires that you use for your project, you might want to purchase different sizes of cutter for your job. Don't use a fine cutter to cut thick wires, as it will probably damage and destroy your cutter in no time! :) A good pair of cutter should be able to give you a crisp and quick cut without hurting your hand.
Round-Nose Pliers
 This is the shape of the tip of my round-nose pliers. Depends on the style of jewelry that you make, the finer the tip the more delicate of the wire work you can make. When selecting your round-nose pliers, try closing the pliers and while holding the handles, examine whether the two tips align properly. I had bought a pair of cheap round-nose pliers in the past which I found out later that they don't really align perfectly. So, make sure you check this feature before you buy it. As long as the tips align properly, even a cheap round-nose plier should be safe for purchase.
Chain-Nose Pliers
 This is the shape of the tip of my chain-nose pliers. I generally prefer the chain-nose pliers with teeth. It gives me a better grip to the wire, and makes the job a lot easier. However, flat chain-nose pliers is also available, this style becomes more essential if your design calls for thicker wires. Without the teeth, your pliers will not cause markings on your wires, and damage the look of your finished project.
My Tools
 The tools that I am using for almost all of my jewelry-making projects are shown here. These tools include a pair of good scissor, chain-nose pliers, round-nose pliers, and side cutter.
Pliers are absolutely essential in jewelry-making, and it would be especially worthwhile for you to get a good sturdy pair of pliers. If you are serious about learning this craft, do not settle for a set of pliers that seem almost too cheap to be true. During my early years of jewelry-making, I had bought some really cheap and crappy tools that seem almost useless now. In fact, I had put them away with all my other heavy-duty home-maintenance tools and pliers. Remember, if you want to make beautiful wire-work, you will need good tools to accomplish your goal.
When selecting your pliers, try holding them in your hand, and see if the handle feels comfortable in your palm. If you don't feel very comfortable holding the pliers, chances are when you are working on your project for several hours straight, your hand is going to feel very sore and tired.
One more important thing on pliers! I also prefer pliers that operate on regular springs rather than double-leaf springs. One thing I find about pliers that operate on double-leaf is that the leaf tend to lose its alignment and became quite annoying. Take a close look at the round-nose pliers that is shown in the picture above, notice the spring between the handles, try to pick a pair of pliers that operates on this kind of spring.
Tuesday, March 31, 2009
Earring Packaging
 Are you selling your earrings? How are you presenting them? I thought about a good way to package earrings by putting them in a 2" zip bags. You can staple a half folded 2"x 2" tag with names, website and contact information on top of the bag. Now your earrings can have a unified and professional look.
Do you have any other ideas? Please feel free to contribute on this thread!
Monday, March 30, 2009
Google Reader Keeps You Posted
Do you want to keep track on my new posts? This is a good video clip that I found on YouTube, it will teach you how to subscribe and get all the updated content of the sites you want to keep track, including my blog! :) A very handy tool to have! Click play to watch!
Bracelet 001
Level of difficulty: ♥♥
 This is a great handmade jewelry project for beginners. Below are the tools and supplies that you will need for this bracelet.
Tools:
Chain-nose plier
Round-nose plier
Scissor
Materials:
5 x 10mm glass pearls
5 x 8mm glass pearls
12" 2mm thick leather cord
5 x jump rings
2 x cord tips
10 x 1.5" ~2" headpins
1 x lobster claw clasp
Directions:
1. Take the leather cord, tie a simple regular knot 1.5" away from one side of the cord. Just before you tighten the knot, attach one jump ring to the loop of the card, then tighten the knot.
2. String the pearls onto the headpins, and make a loop with your round-nose plier.
3. Attache all of your pearls to the jump rings.
4. Once you finish adding all the pearls, wrap the leather cord around your wrist. Cut off excess cord so that the length of the cord is exactly your wrist size. Don't worry that this will be too tight for your wrist, because you have yet to add the end tips and the clasp.
5. Finish the bracelet by adding the end tips and the clasp, and the bracelet should be just the right size for your wrist!
Saturday, March 28, 2009
About my upcoming jewelry tutorials
Through out my teaching experience, I'd found it is faster and more rewarding for students to learn jewelry making by first choosing a simple project to start. Gradually, you can try more difficult jewelry projects that involve more advanced techniques. It’s more fun to learn this way, and you can feel very rewarding even after your very first simple project.
I would like to dedicate this blog to everyone who enjoys making jewelry on their own. I would also share what I have learned through out the years. If you have a new project idea, you are welcome to chip in and share your ideas here, too!
So, no more talking, let us start making some exciting jewelry together! Please check again in a few days, I’ll be posting my very first online jewelry tutorial here! If you would like to be informed of my new jewelry tutorial releases, please feel free to subscribe to this blog!!
Hello
Thank you for visiting my blog. This is the 24/7 online jewelry class where I will be sharing and discussing jewelry making ideas and skills with all of you that are interested in learning this exciting hobby. For those of you that had taken my classes either through Michaels or in private, thanks so much for your continuing support!! I hope you will be excited to see this blog.
Subscribe to:
Posts (Atom)